All domains registered with xByte Hosting are given DNS Management via the billing control panel. This article’s goal is to act as a guide for managing your DNS records.
-
To begin, you must log in to the billing control panel. Below is our Billing Control Panel URL.
Billing Control Panel: https://billing.xbytehosting.com/
-
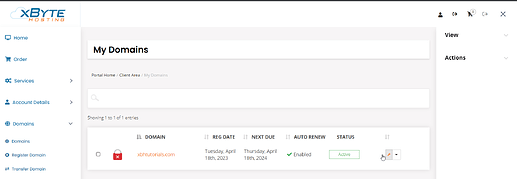
Select “My Domains” from the dashboard.
-
Click on the Wrench Icon for the Domain you’re trying to manage.
-
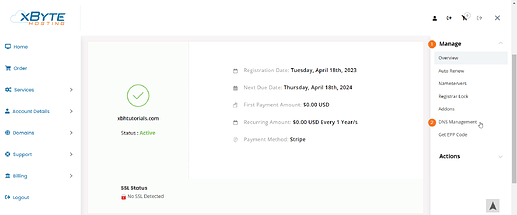
Click on the "Manage" drop-down on the right, then select “DNS Management”.
-
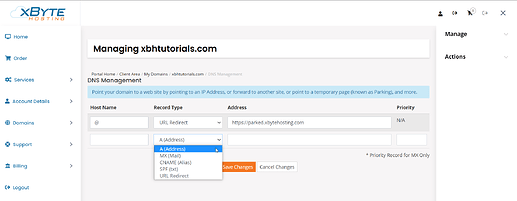
Fill in the Host Name, Record Type, and Address. Only fill in Priority if you chose MX as the Record Type.
-
Hostname: Use @ to specify your root domain (example.com). Use www to set DNS records for www.example.com.
-
Address:
- A (Address): The IP Address that you want your domain to resolve to.
- MX (Mail): The Mail Server that your domain will resolve to.
- CNAME (Alias): The canonical name that your domain will resolve to.
- SPF (txt): Identifies the mail servers and domains that are allowed to send emails on behalf of your domain.
- URL Redirect: The URL you want your domain to redirect to. Redirects traffic from your domain to the specified address.
-
Priority: Only used with MX records. Sets the priority for the mail server.
- Click “Save” to save your changes. Once your changes are saved, you can add another DNS record.
Deleting Records
To delete a DNS record, all you need to do is clear the Address field and then click “Save”


