
When sending emails from your server, it’s crucial to meet industry standards to prevent your emails from being filtered as spam. This article provides a step-by-step guide to preparing your domain for sending emails.
Setting up SPF
An SPF (Sender Policy Framework) record is a TXT record in your DNS that lists the servers authorized to send emails on behalf of your domain. Without this record, most email providers will block your emails, as they cannot verify whether the emails are legitimate.
Here is an example of what an SPF record looks like:
v=spf1 ip4:198.51.100.123 -all
Every SPF record will start with “v=spf1” and then you add the public IP of your server using “ip4:{IP}”, then you finally end the record with a “~all” or “-all”.
The “~” represents a soft fail if someone fails an SPF check and “-” represents a hardfail. You can start off with a soft fail and once you confirm that all your legitimate emails are passing SPF checks, then you can switch to a hard fail.
You can see what this would look like in Cloudflare DNS:

Setting up DKIM
DomainKeys Identified Mail (DKIM) stands as a crucial email validation system, purposed for the prevention of email spoofing. By integrating a digital signature within an email’s headers, DKIM assists in verifying the email’s authenticity, ensuring it originates from its declared domain and remains unaltered during transmission.
You can find the steps below on how to enable DKIM for a domain in Smartermail:
-
log in to Smartermail admin
-
Select the domain you want to add DKIM to.
-
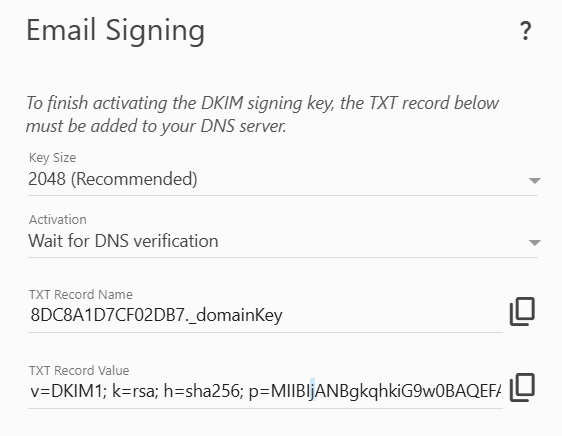
Navigate to the general tab and enable “Email Signing”.
-
You will need to copy the DNS record that it displays for you so you can add it to your DNS and then click “Save”.


Settings up DMARC
Domain-based Message Authentication, Reporting, and Conformance (DMARC) is a protocol that uses SPF and DKIM to determine the authenticity of an email message.
You can generate a DMARC record by going to the following URL and following their step by step process:
DMARC Record Generator - Create DMARC DNS Records - MxToolbox
You can see steps on how to generate the DMARC record below:
- Enter your domain name on the DMARC search.
- Fill out the necessary information.
- Then you will add the generated DNS record in your domain’s DNS.


Once you have gotten each of these set for your domain, then you will be ready to send emails from your server.
If you would like more info on each of these items, then please view the documentation below:
==[SPF]==
Sender Policy Framework (SPF)
==[DKIM]==
DomainKeys Identified Mail (DKIM)
==[DMARC]==
Domain-based Message Authentication, Reporting, and Conformance (DMARC)
If you have any questions or encounter issues, please don’t hesitate to reach out to [email protected].