Windows Firewall - IP whitelisting
Brief overview on how to whitelist IPs in Windows firewall rules.

Overview
Whitelisting IPs restricts inbound access so only approved public IP addresses can connect to specific services. This reduces exposure to brute-force attacks and unauthorized access.
Common services and their default port numbers:
-
RDP (Remote Desktop Protocol) — TCP 3389
-
SQL Server — TCP 1433
-
MySQL — TCP 3306
-
FTP — TCP 21 plus a configured passive port range(TCP - 5550 - 5650)
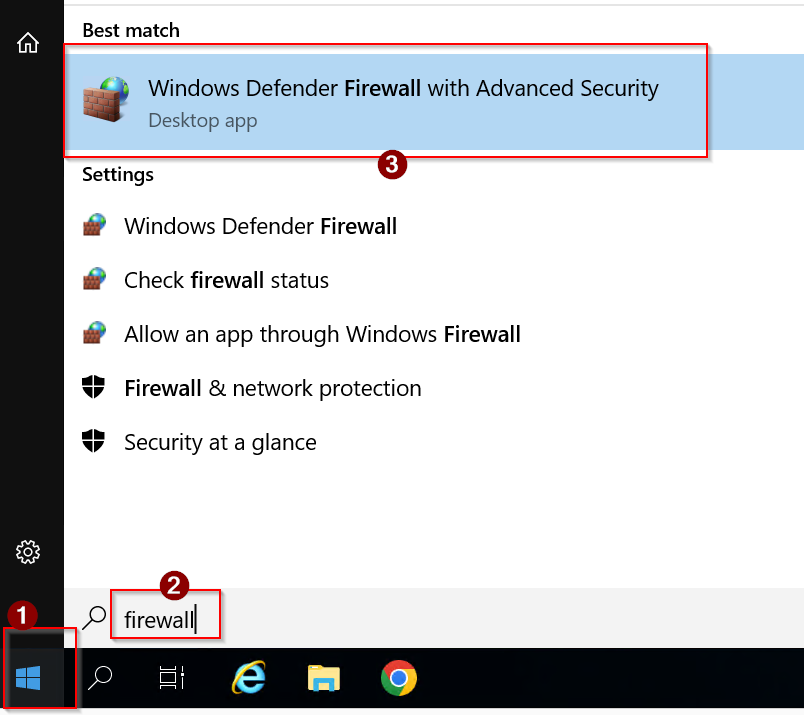
Step 1 — Open Windows Defender Firewall with Advanced Security
Use this when you’re already logged into Windows normally (RDP or local session).
-
Click Start
-
Search: Windows Defender Firewall with Advanced Security
-
Open it
-
In the left pane, click Inbound Rules
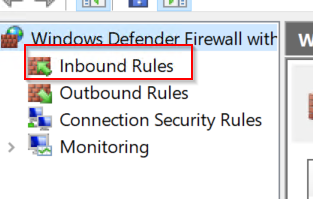
Step 2 — Locate the Existing Firewall Rules
-
In Inbound Rules, sort by Name.
-
Locate the existing rules for:
-
Remote Desktop
-
SQL Server (may list the instance name or port)
-
FTP Server / FileZilla Server / IIS FTP
-
-
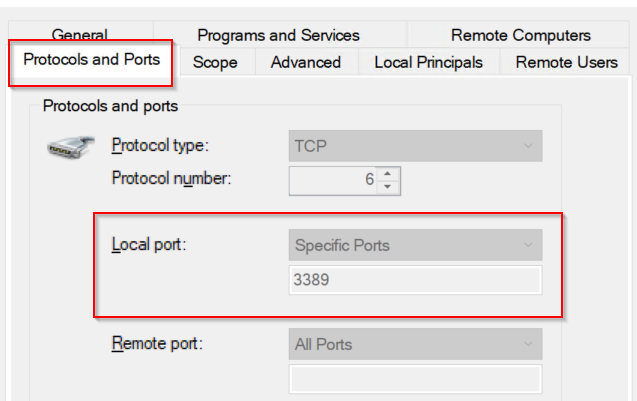
Double-click the relevant rule.

-
Confirm under Protocols and Ports that the rule matches the correct port.
-
Go to the Scope tab.
Step 3 — Whitelist IPs existing Rules
-
Open the existing inbound rule.
-
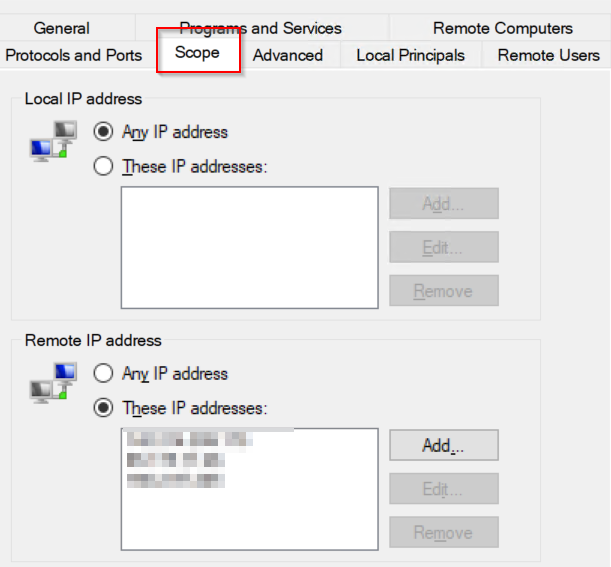
Select the Scope tab.
-
Under Remote IP address, select:
These IP addresses -
Click Add…
-
Enter the approved IPs or subnets.
-
Click OK → Apply
![]() Once saved, only the listed IPs will be able to connect using that rule.
Once saved, only the listed IPs will be able to connect using that rule.
Step 3 — Test Before Closing Your Session
From a whitelisted IP:
-
Test RDP login
-
Test SQL connectivity
-
Test FTP login and file transfer
From a non-whitelisted IP (if possible), confirm connections fail.
Important Notes
-
If a service is still accessible publicly, there is likely another enabled allow rule that must also be updated.
-
Some services (especially RDP) often have multiple firewall rules by profile — all applicable ones must be scoped.