Overview
This article will serve as a guide for setting up a Cloudflare Security Rule to allow xByte Cloud Monitoring to work as expected without any interference.
Prerequisite
Reach out to our team of engineers to get the monitoring IP address so that you may whitelist it within Cloudflare. Below is our documentation for reaching out to our team of engineers.
Steps
-
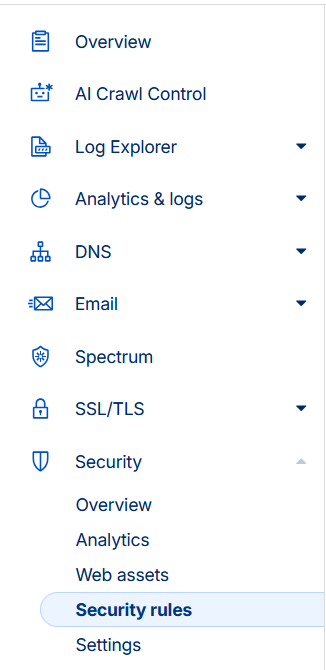
Log in to your Cloudflare account and select ‘Security Rules’ within the ‘Security’ drop-down.
-
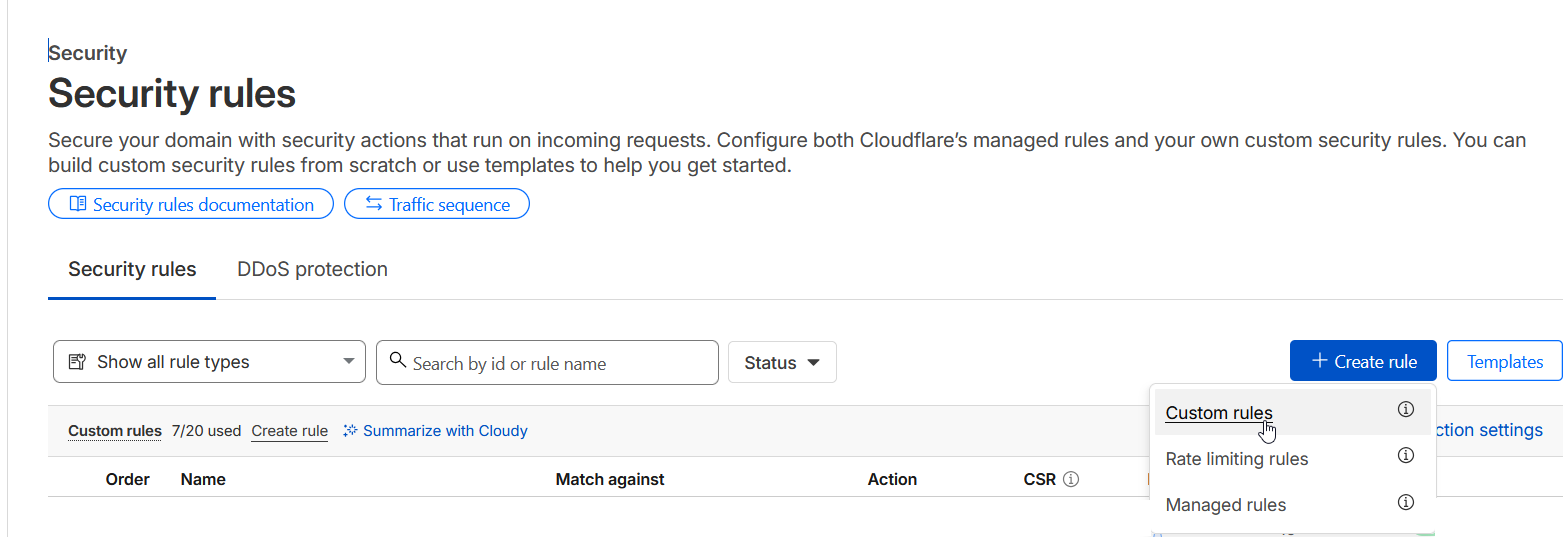
On this page, select the “+ Create Rule” button and choose “Custom Rules”.
-
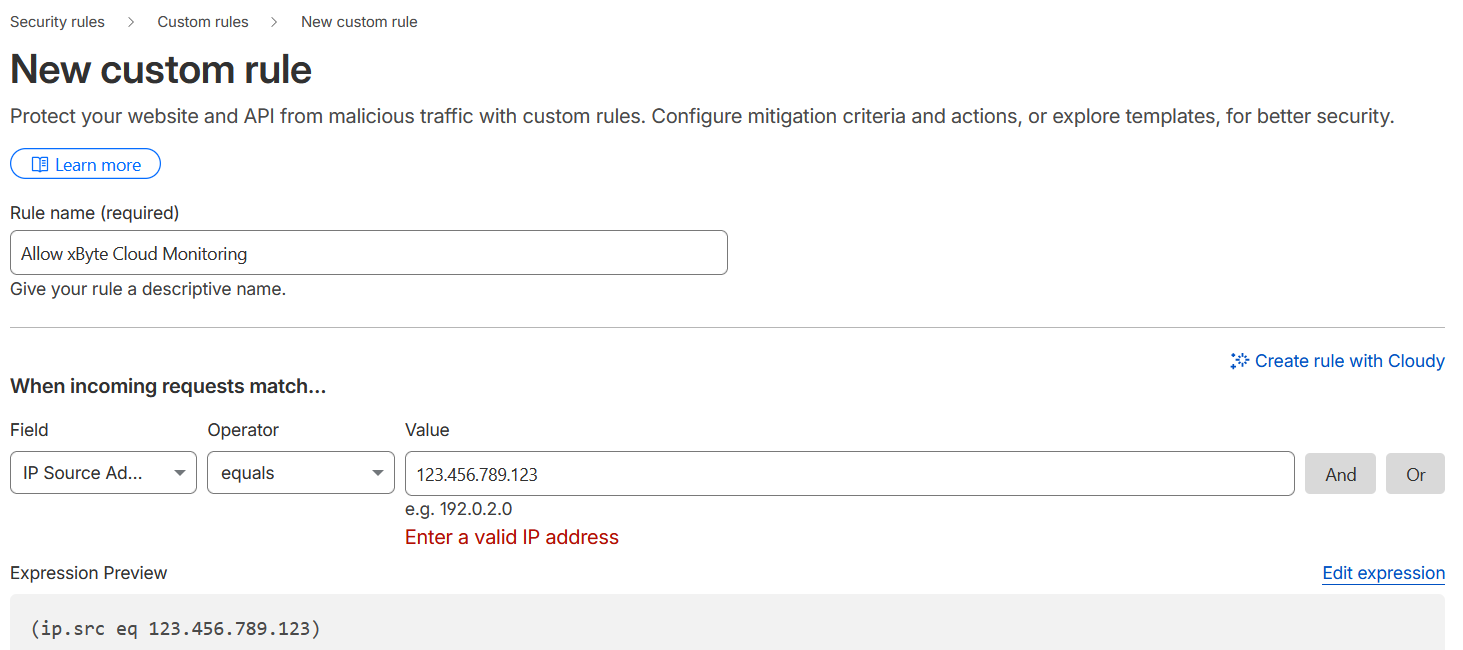
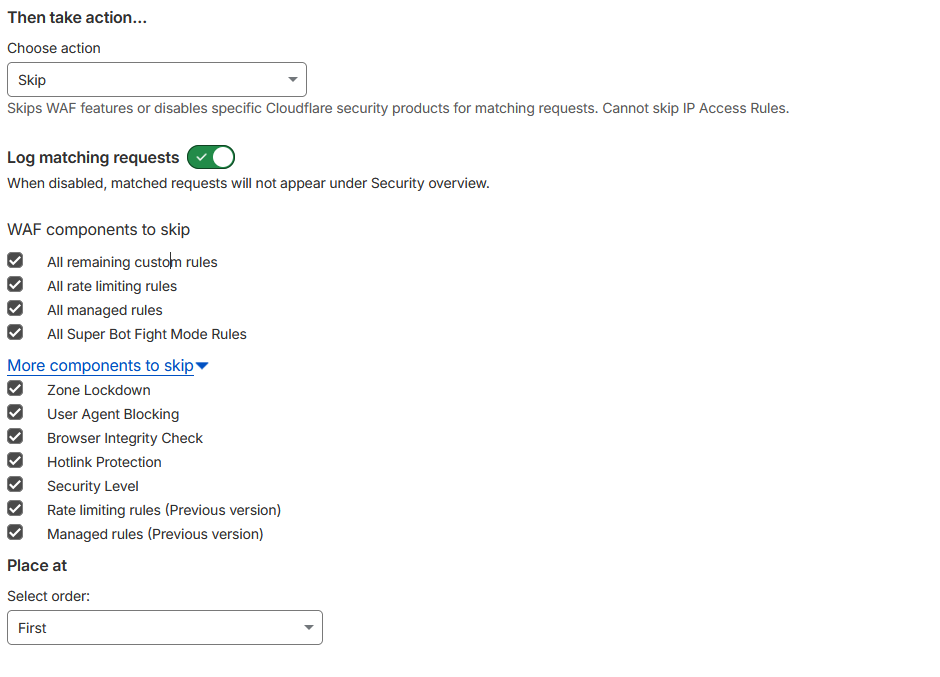
Create the rule using the same settings pictured below. NOTE: You’ll need to replace the “123.456.789.123” IP Address with the one given to you by our engineers.
-
Now click the “Deploy” button in the bottom right.
Conclusion
That’s it! After clicking “Deploy”, you’ve successfully created a Cloudflare whitelist security rule to allow xByte Cloud Monitoring to continue monitoring your site without interference.
Please update our Engineers in the ticket where you’ve requested the IP so that they may make the necessary changes on their side.
If you require any further assistance, please don’t hesitate to reach out to our team of engineers.