ColdFusion WebSockets allow real-time communication between a server and client, enabling applications such as chat systems, live notifications, and stock tickers. When running ColdFusion behind IIS, WebSockets require additional configuration to function correctly using a WebSocket proxy. This guide will walk you through enabling and configuring the ColdFusion WebSocket proxy with IIS, and testing its functionality.
Prerequisites:
ColdFusion must already be installed, and the site that’ll be using WebSockets must already exist in IIS.
Steps to Enable WebSocket Proxy
-
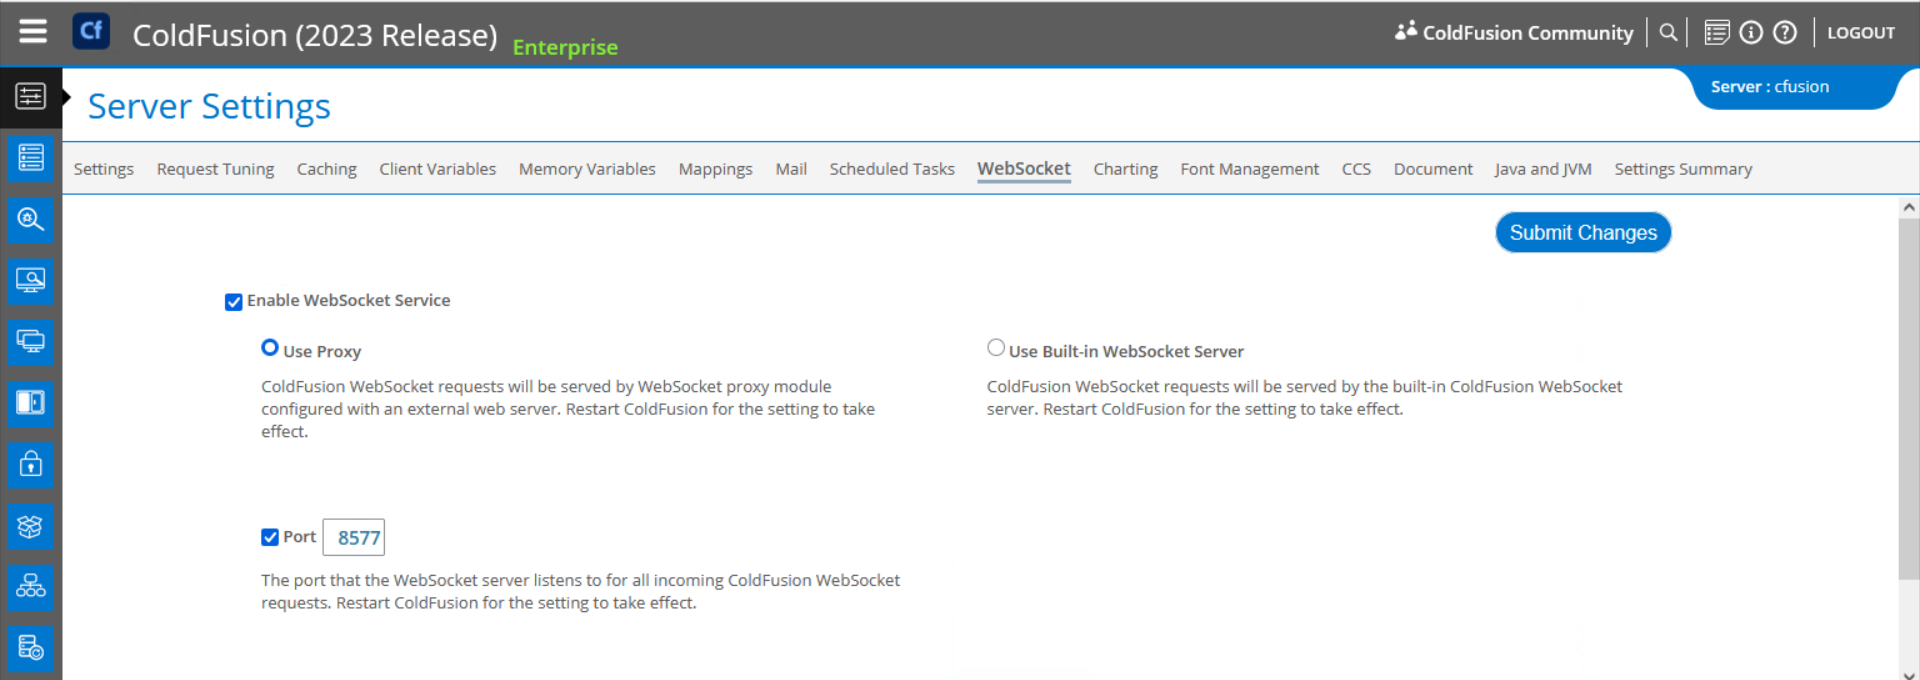
Log in to ColdFusion Administrator (CFAdmin) and navigate to Server Settings > WebSocket.
-
Ensure that the “Enabled WebSocket Service” option is checked.
-
Select “Use Proxy”, and take note of the proxy port. In this example, we use 8577.
Steps to Configure WebSocket Proxy in IIS
-
Navigate to the ColdFusion
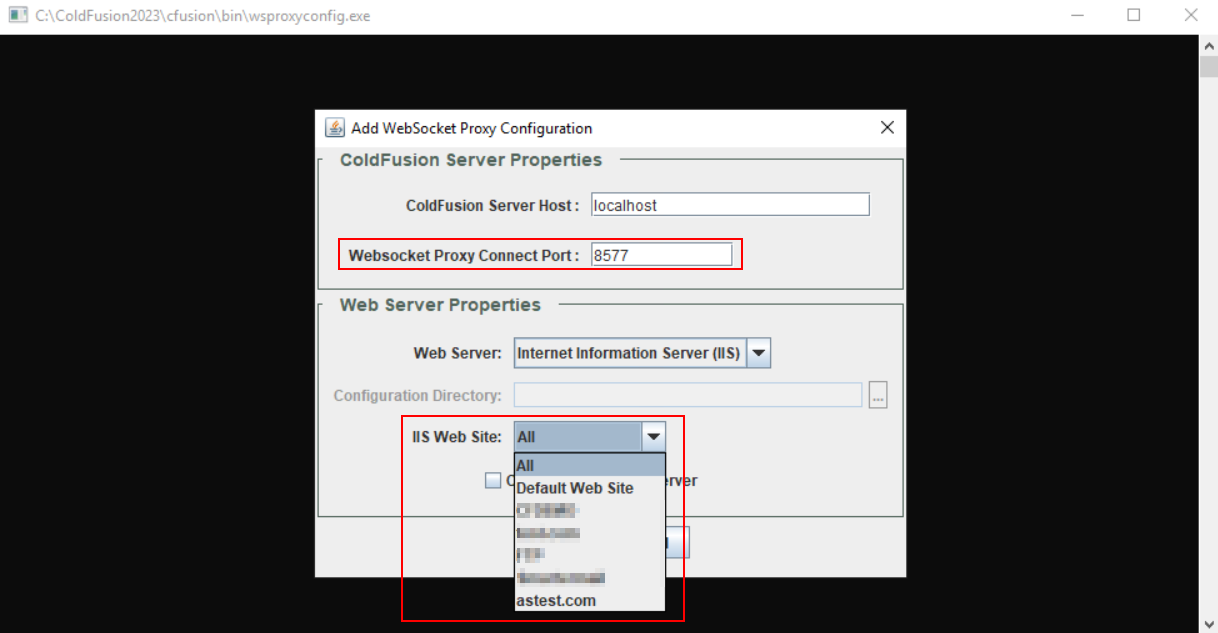
bindirectory and run thewsproxyconfig.exetool as Administrator.
Ex: C:\ColdFusion2023\cfusion\bin\wsproxyconfig.exe -
In the tool, select “Add” from the bottom.
-
Configure the following settings carefully:
-
WebSocket Proxy Connection Port: Set this to the same port noted in Step 3.
-
IIS Web Site:
- All: Configures all sites in IIS to use WebSockets over the proxy. Only select this if you want WebSockets enabled for all sites.
- Specific Site: Choose a particular site that needs WebSocket support. You will need to configure each site individually if choosing this option.
-
Click “OK” to save your selections.
-
You will be returned to the main window of
wsproxyconfig.exe, where your configured sites should now appear. If needed, click “Add” to configure additional sites, or click “Close” to exit the tool.
Restart IIS (if necessary)
Some changes may not take effect immediately. To ensure proper functionality, restart IIS using the following command in an Administrator Command Prompt:
iisreset
Testing WebSockets
We recommend using Adobe’s sample WebSocket code to verify WebSocket functionality.
- Create an
Application.cfcfile and define a “stocks” channel. - Create an
index.cfmfile that subscribes to the “stocks” channel. - Open the test page in a browser.
If WebSockets are configured correctly, you should see output similar to the following:

If WebSockets are not working, you may see a blank white page. If you encounter this issue, then please don’t hesitate to reach out to our team of Engineers for assistance.