How to Switch between ColdFusion versions
Step by step guide on switching between ColdFusion versions with side-by-side CF installation.

DISCLAIMER: The side-by-side installation would need to be configured by xByte Cloud before following steps in this article. Please reach out to our support team if you have questions.
When you have a side-by-side install, there will be a number of steps that you will need to take on the web server to switch the ColdFusion version that your application is utilizing. This article will act as a guide to give you step-by-step instructions on how to make this switch.
IMPORTANT NOTE: If you’re testing and plan to switch between ColdFusion versions, make sure to note which connector the site is using with the current version before switching to the new one.
Part 1 - Update virtual directory
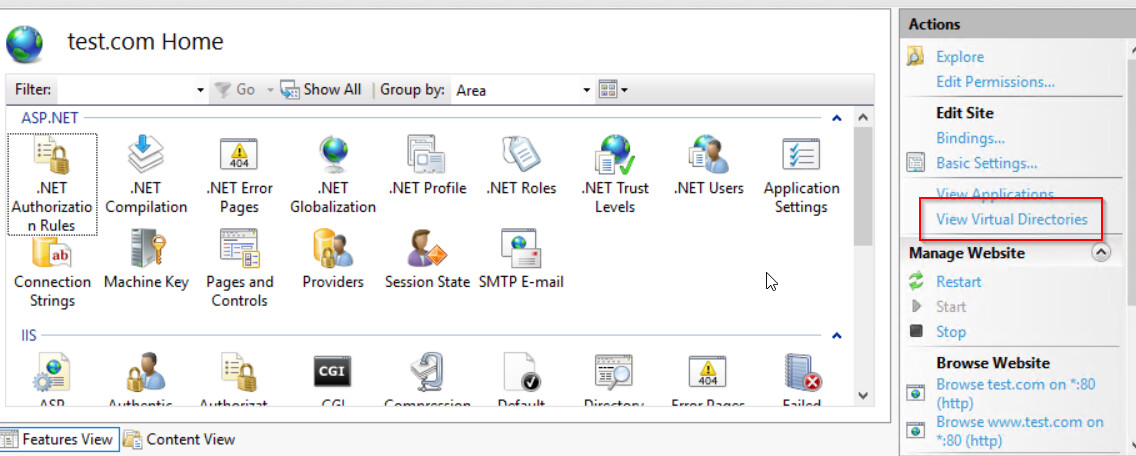
- Open IIS
- Select the site that you are switching ColdFusion versions on
- Select Virtual Directories.
- Change the path for the jakarta and cf_scripts physical path to use the version of ColdFusion that you are switching to by selecting the virtual directory and then clicking Basic Settings
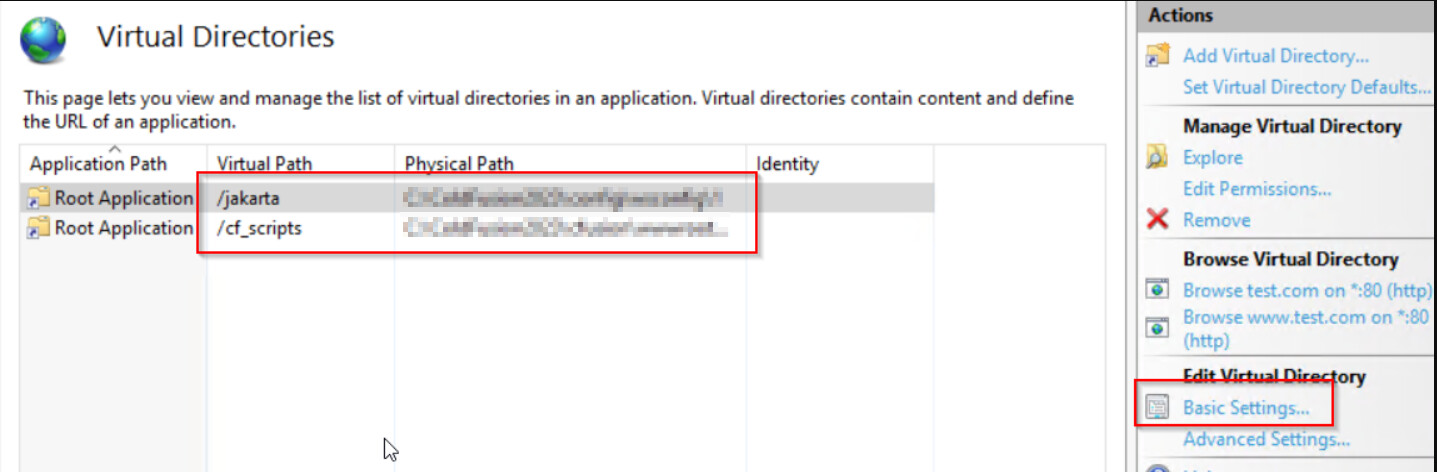
You will be presented with a window that allows you to update the physical path, once this has been completed for both virtual directories, you can move onto Part 2.
NOTE: If you’re not sure where the ColdFusion connector is located, you can find its physical path by going to:
C:\ColdFusionxxxx\config\wsconfig\
Part 2 - Update Handler mappings
- Open IIS
- Select the site that you are switching ColdFusion versions on.
- Select Handler Mappings
- You will then, one by one, select and right-click the following handler mappings and click edit, then update the executable path to match the new version of ColdFusion.

| Handlers List |
|---|
| cfchandler |
| cfmhandler |
| cfmlhandler |
| cfrhandler |
| cfswfhandler |
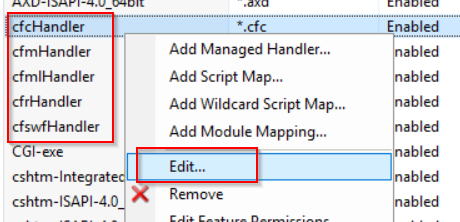
Once you have updated the path on each of the ColdFusion handler mappings, you can move on to the next part.
Part 3 - Update ISAPI Filter
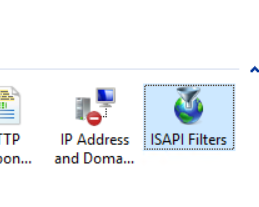
- Open IIS
- Select the site that you are switching ColdFusion versions on.
- Select ISAPI FIlters
- Select the ColdFusion-specific ISAPI Filter (Usually named “Tomcat”) and click edit, and update the path to the new ColdFusion version.

Alternatively, if you are unable to edit the Tomcat ISAPI filter as shown in the steps above, you can use the steps below:
-
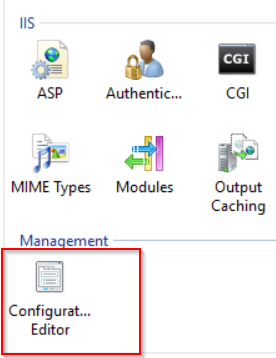
Once you have selected your site in IIS, go to the Configuration Editor.
-
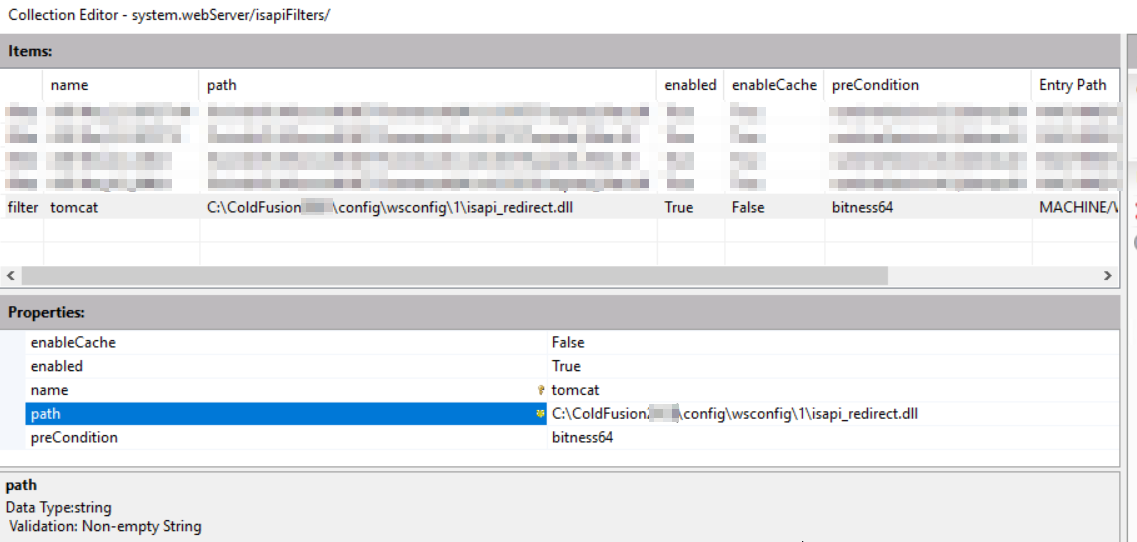
Then you will need to click the section drop-down and find system.WebServer/IsapiFilters, then click the 3 dots on the far right.
-
You will then click on the Tomcat filter, and then you will update the path to the new path that you are setting it to.
-
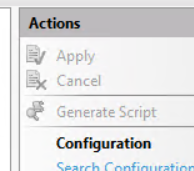
Next you will close the window where you edited the path and click Apply.

Once you have finished updating the path for the ISAPI filter then you have finished switching ColdFusion versions for your website.
How to revert to the old ColdFusion version during testing
During testing, you’ll need to switch to the new ColdFusion version to run your tests. You may then want to revert back to the old version until you’re ready to make the new version live.
The safest way to do this is to follow the same steps you used to switch to the new version—just switch back to the old ColdFusion version instead.
Please don’t hesitate to reach out to our team of engineers if you encounter issues or have any questions.